Test with Postman
Postman is commonly used by developers to evaluate and test APIs. As it pertains to OAuth 2.0, you can set up OAuth 2.0 in Postman to authenticate and get a valid access token. Then, you can hit different Mural endpoints from Postman.
First, you’ll register your app in Mural. The next steps take place in Postman. You'll:
- Set up a Postman environment.
- Add environment-level variables.
- Add a collection for Mural endpoints.
- Set up OAuth 2.0.
We'll also walk you through how to:
- Add a request to test a Mural endpoint.
- Request a refresh token.
- Automate the refresh token workflow using variables.
Setting up your environment in Postman
You’ll need to set up an environment in Postman to store your API credentials.
Adding variables
We recommend adding environment-level variables. Variables in Postman are key-value pairs. Each variable name represents its key, so referencing the variable name allows you to access its value. For example, in a Client ID field, you can enter {{client_id}} rather than having to find and re-enter your Client ID multiple times.

We recommend adding the following variables to your environment:
| Variable | Initial Value | Current Value |
|---|---|---|
| muralDomain | https://app.mural.co | https://app.mural.co |
| client_id | < enter your app's client ID > | < enter your app's client ID > |
| client_secret | < enter your app's client secret > | < enter your app's client secret > |
| scopes | < enter scopes you want to grant access to > | < enter scopes you want to grant access to > |
Adding a new Collection in Postman
Postman Collections are a group of saved requests you can organize into folders. Every request you send in Postman appears under the History tab of the sidebar.

Setting up OAuth 2.0 in Postman
To set up OAuth 2.0 for the Mural API in Postman:
-
Open the Collections tab on the left side of the screen.
-
Open your collection or create a new one.
-
On the Authorization tab, select OAuth 2.0 from the Type drop-down.
-
Select Request Headers from the Add auth data to drop-down.
-
Click the Authorize using browser checkbox.
Note:Make sure you set up the Redirect URL value on your App to the same Postman Callback URL value.
- In the Auth URL field, add the path
/api/public/v1/authorization/oauth2after your environment domain. If you added variables to your environment, type your variable and then add the path to it. For example:{{muralDomain}}/api/public/v1/authorization/oauth2 - In the Access Token URL field, add the path
/api/public/v1/authorization/oauth2/tokenafter your environment domain. If you added variables, type your variable and then add the path to it. For example:{{muralDomain}}/api/public/v1/authorization/oauth2/token - Make sure the Client ID and Client Secret fields match your client app credentials. Or, if you have variables for your Client ID and Client Secret, enter those here. For example:
{{client_id}}and{{client_secret}} - In the Scope field, add the scopes you want to grant access to. Or, if you have a scope variable, enter that here. For example:
{{scopes}} - Click Save at the top of the screen.
- Click on Get New Access Token to complete the OAuth 2.0 flow and get a valid access token and refresh token.

- You’ll be redirected to an Authentication screen in Mural. Click Allow.
Here’s what you’ll see when your authentication is successful:

Heads upMake sure to allow Postman pop-ups in your browser. Otherwise, the pop-up gets blocked and your authentication won’t work. If your pop-up gets blocked: enable pop-ups, cancel your authentication, and click the Get Access Token button again.
If you get an error message, check the following:
- Make sure the variables you entered in the Collection and Request screens exactly match the names of the variables you entered in your environment.
- Make sure your
muralDomainvariable’s value doesn’t have a forward slash (/) at the end. - Your app may not yet be whitelisted. Reach out to Mural Support to enable your app.
Adding a new request in Postman
Now, you’ll add a new request to your Postman collection. An API request allows you to transfer data to or from a data source. Each API request uses an HTTP method. The most common methods are GET, POST, PATCH, PUT, and DELETE.
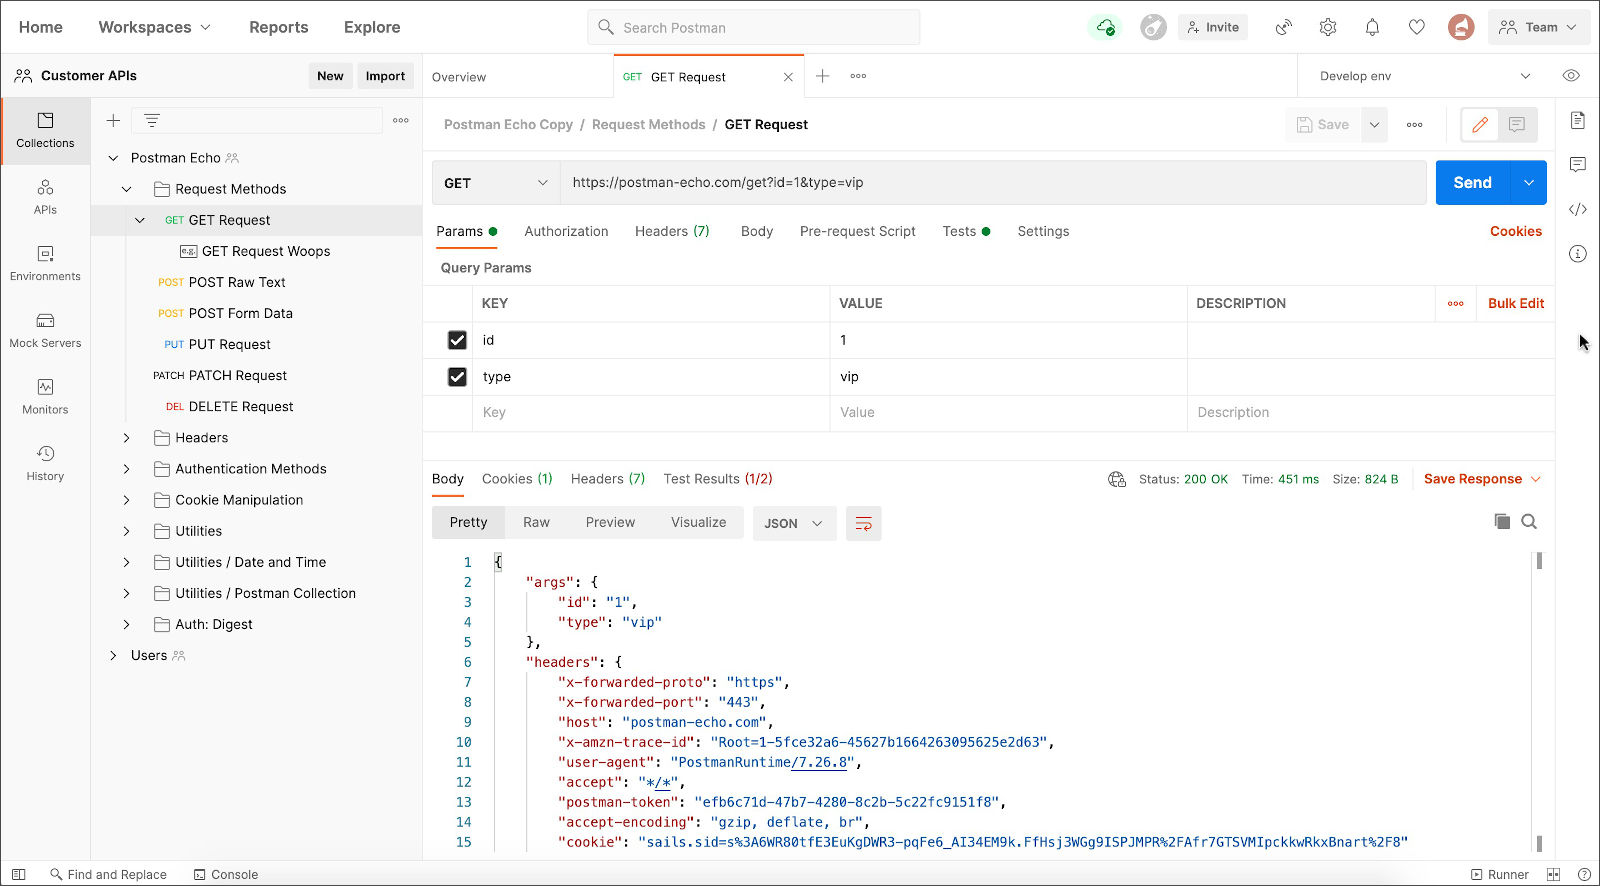
For this example, we’ll walk you through adding a GET request for Mural’s Get current user endpoint.
Note:To get details on the Get current user endpoint, go to the API Reference > Get current member.
-
Under your New Collection, click Add a request.
-
Enter Get current user as the title of the request.
-
Select GET as the method.
-
In the Enter request URL field, enter:
{{muralDomain}}/api/public/v1/users/me. -
Click the Send button.
You should see your response in the Response Body window at the bottom of the screen.
Here’s an example of a successful response:

Requesting a Refresh Token in Postman
Your access token expires every 15 minutes. When your access token expires, you must request a new token. While you can repeat the above flow and click Get New Access Token on your Collection’s Authorization page, we recommend automating the refresh token flow. This way, an expired token simply gets replaced.
Here’s how to automate the process in Postman:
-
Click the Import button on the left side of the screen.
-
Click the Raw text tab.
-
Paste the following command:
curl --location --request POST 'https://app.mural.co/api/public/v1/authorization/oauth2/refresh' \
--header 'Authorization: Basic username and password' \
--header 'Content-Type: application/json' \
--data-raw '{
   "grant_type":"refresh_token",
   "refresh_token": "refresh_token_value"
}'
Note:The Authorization header's username and password should be a base64 encoded string of
{client_id}:{client_secret}.
- Click Continue.

-
Click Import.
-
If you have a variable for your domain, replace the domain in the Request URL with your variable. For example:
https://app.mural.co/api/public/v1/authorization/oauth2/refreshbecomes{{muralDomain}}/api/public/v1/authorization/oauth2/refresh -
Click the Authorization tab.
-
Select Basic Auth from the Type drop-down.
-
Enter your client ID in the Username field. Or, enter your Client ID variable.
-
Enter your client secret in the Password field. Or, enter your Client Secret variable.
-
Click Save.

-
Enter a Request name (e.g. Refresh Token).
-
Click the Body tab.
-
Replace
refresh_token_valuewith the refresh token you received when completing the OAuth 2.0 flow. -
Click Save on the Save Request screen.
Now, you can click Send to call this Refresh Token endpoint. A successful request returns a new access token and a new refresh token. Here's an example response:
{
    "access_token": "new_access_token_value",
    "expires_in": 900,
    "refresh_token": "new_refresh_token_value",
    "token_type": "bearer"
}
Note:You can always repeat the flow by clicking Get New Access Token on your Collection’s Authentication page.
Automating Refresh Token workflow using variables
Ready to take your automation a step further? You can create a variable for your refresh token and add a couple lines of code to your Refresh Token request. Then, each time you call the Refresh Token endpoint, your refresh token variable automatically updates.
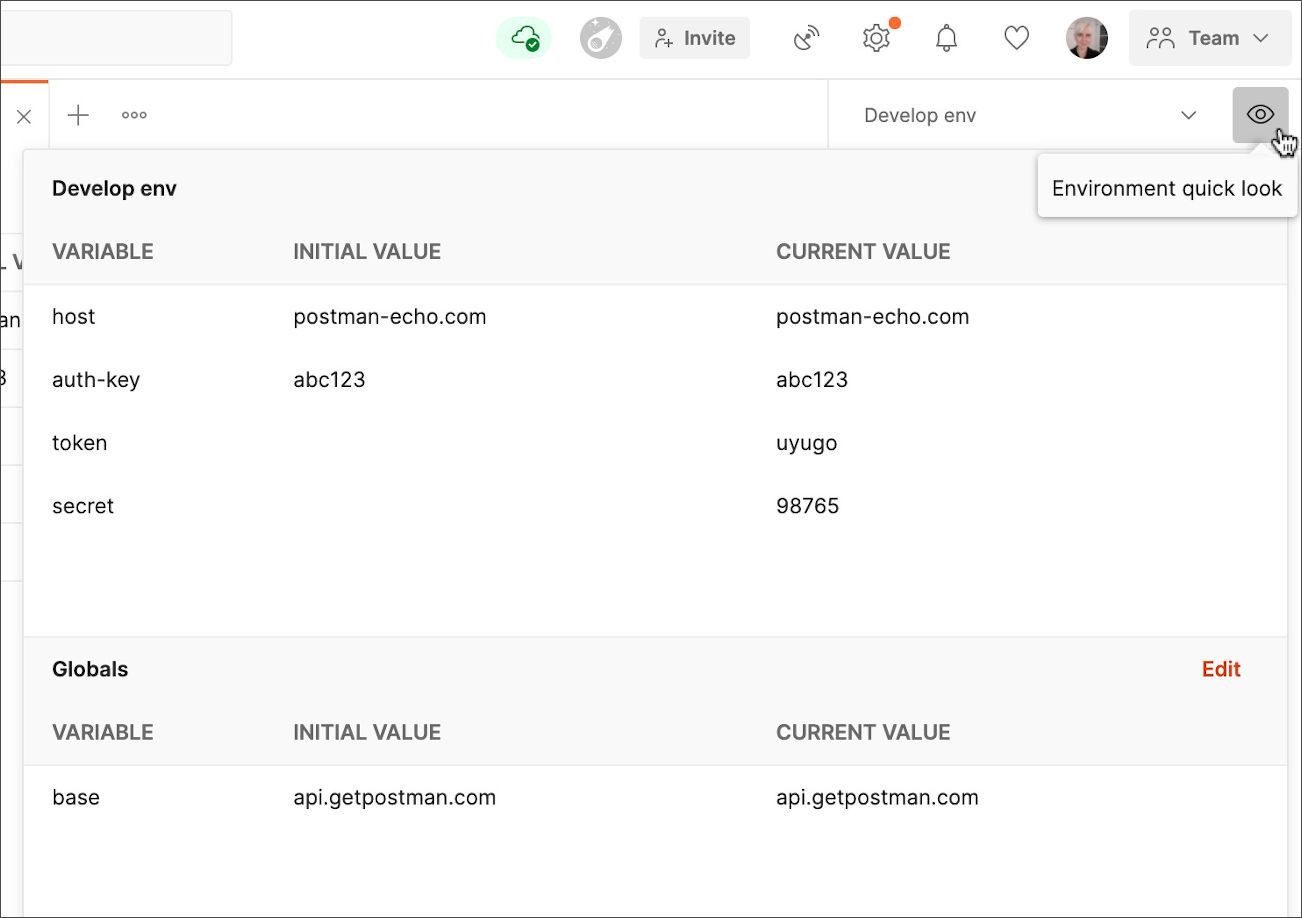
-
Click the Environment quick look button (eye icon) in the top-right corner of the Postman screen.
-
Click Edit.
-
Add a new variable. For example:
refresh_token -
Enter your refresh token value in the Initial Value and Current Value fields for your
refresh_tokenvariable. -
Click Save.
-
Open your Refresh Token request.
-
Open the Body tab.
-
Replace the refresh token value with your refresh token variable. For example:
{{refresh_token}}

-
Open the Tests tab.
-
Enter the following code:
const reqBody = JSON.parse(pm.request.body.raw); pm.environment.set("refresh_token", pm.response.json().refresh_token); -
Click Save.
Now, you can click Send to hit the Refresh Token endpoint. The value of your refresh token variable will automatically update each time you call this endpoint.
Note:The
pm.environment.setcommand will only work if therefresh_tokenvariable was created as an environment variable. If you created the variable as a collection or global variable, the command won’t work.
Updated 3 months ago